All I wanted was to sell simple digital products using WooCommerce – my page templates. It should be easy for the buyer so they purchase in just 3 steps
- Click on ‘Buy Now’
- Fill in contact & payment details
- Finish purchase and download item
Not too much to ask in 2023, I thought. I was wrong.
I spent some time to get it to work the way I wanted. I’m sharing every step needed to simplify your WooCommerce setup in this article so you can do the same.
Why is this recommended?
This flow is streamlined for higher conversions / sales. People love simple. WooCommerce out of the box is built for bigger, complicated full fledged e-commerce shops
What we’ll setup?
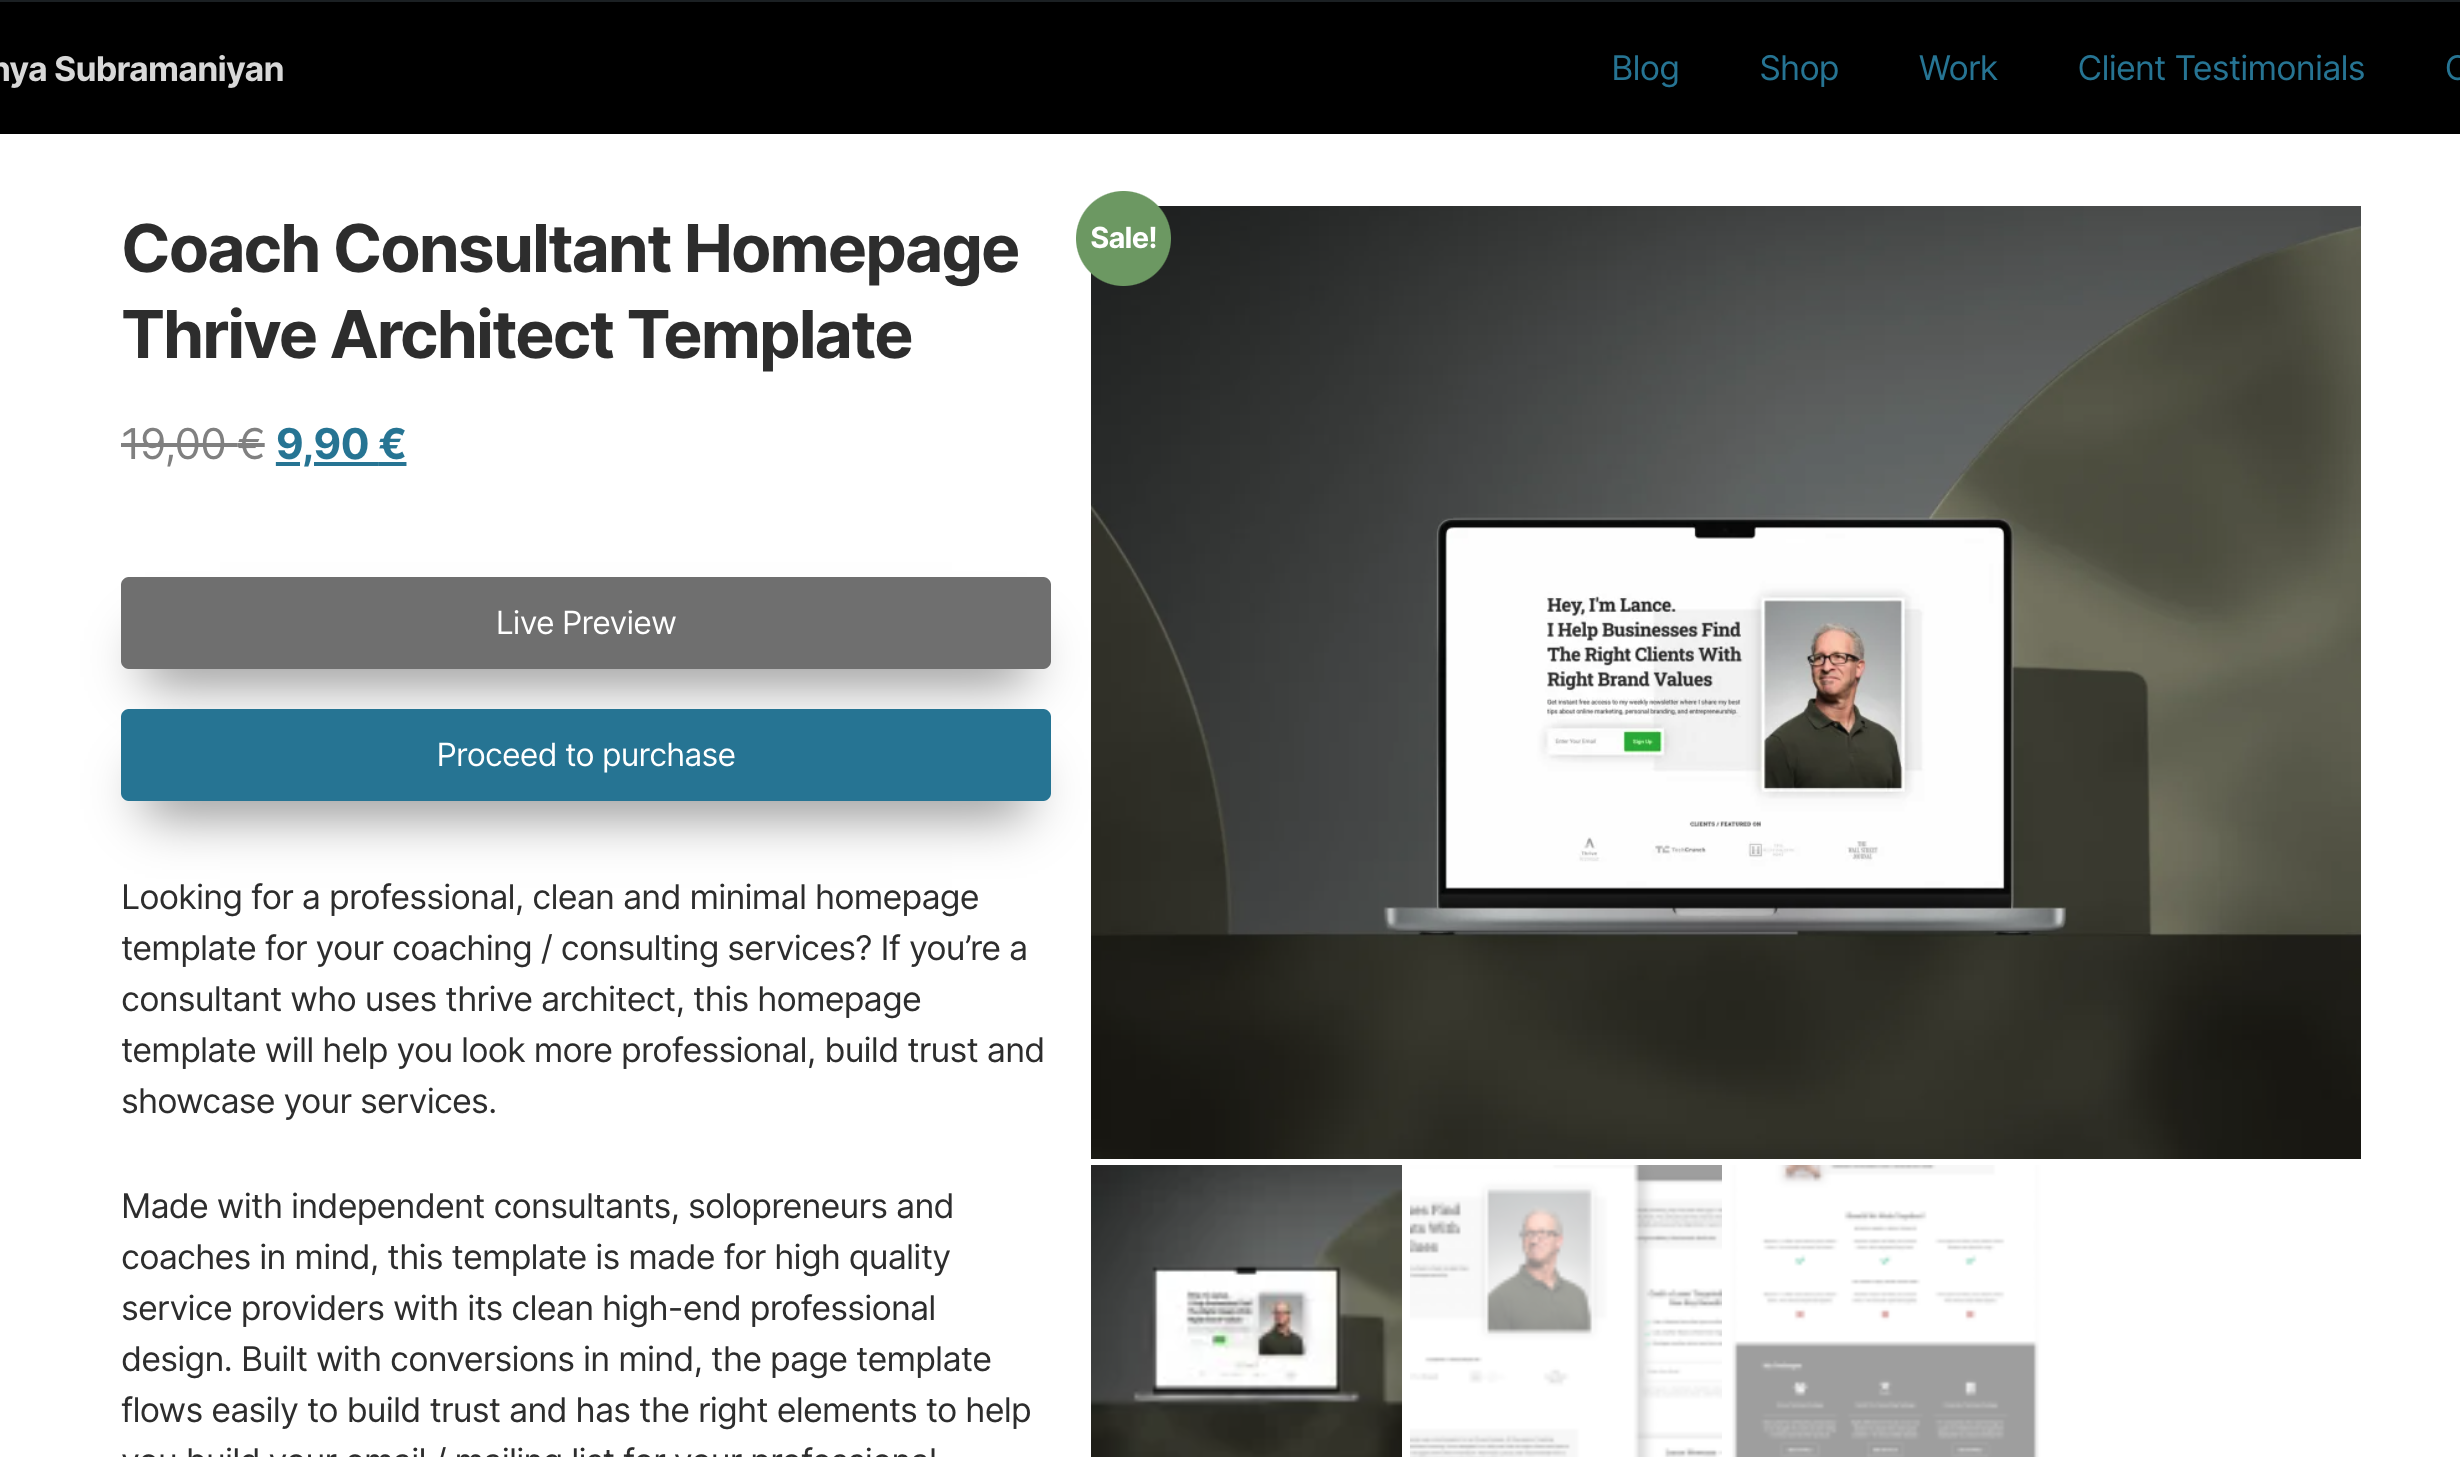
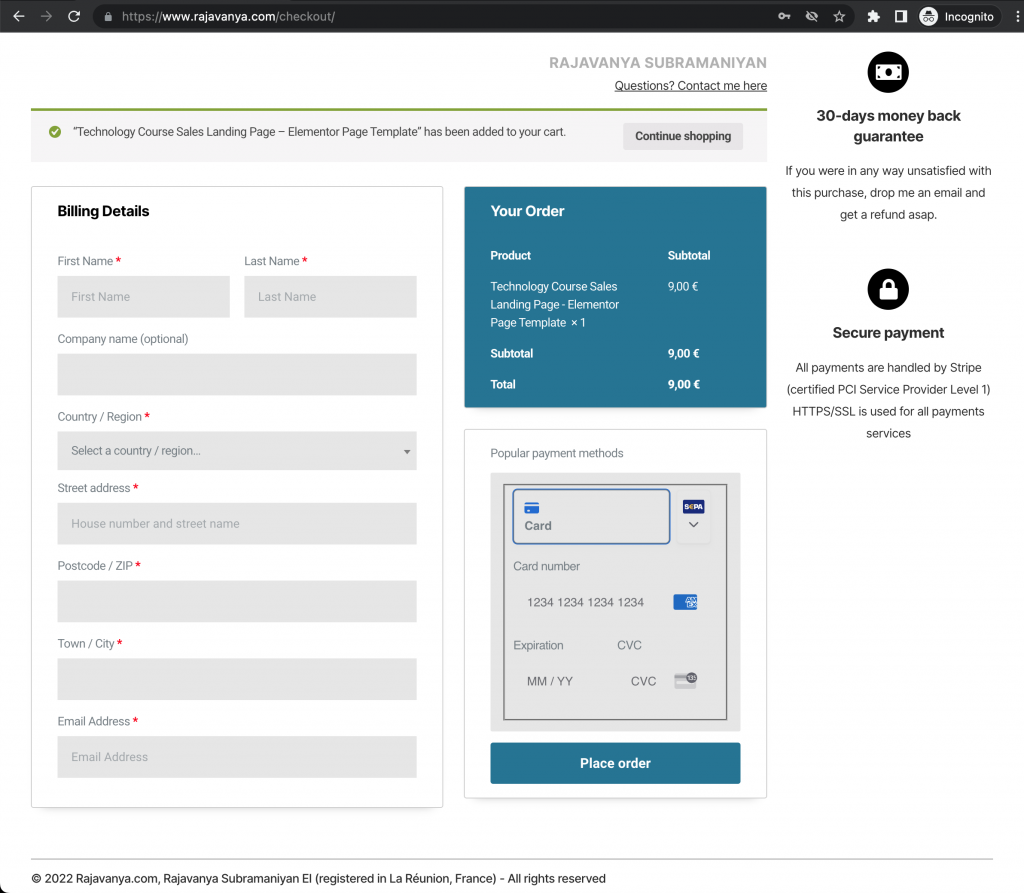
- We’ll setup something similar to the screenshots below.
- I won’t focus on getting the exact look and feel.
- The focus will be on the flow / user experience. Zero fancy stuff.
What You Need
- A website that runs on WordPress and WooCommerce
- 10 mins time
Optionally, you can use Elementor Pro which I use to customize the look and feel of the product page and the checkout page.
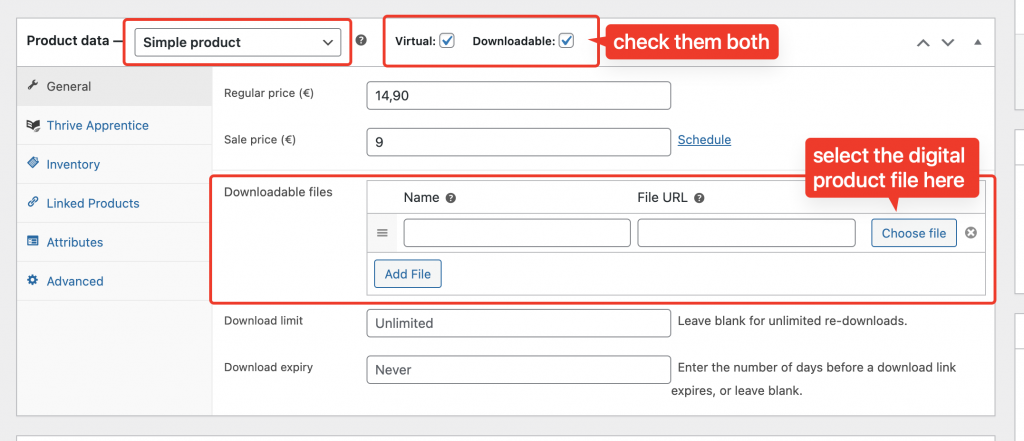
How To Add A Digital Product In WooCommerce
Simply add a new product in WooCommerce (Products > Add New) and configure the following settings as shown in the screenshots below.
Detailed Steps To Streamline The Buying Experience
Here’s what we will do to simplify your WooCommerce setup
- Skip the cart page
- Disable product reviews
- Disable stock management / inventory management
- Disable the cart functionality (and limit only one product at a time)
Skip the cart page
Under WooCommerce > Settings > Products > General, make sure the redirect to the cart page after successful addition is checked.
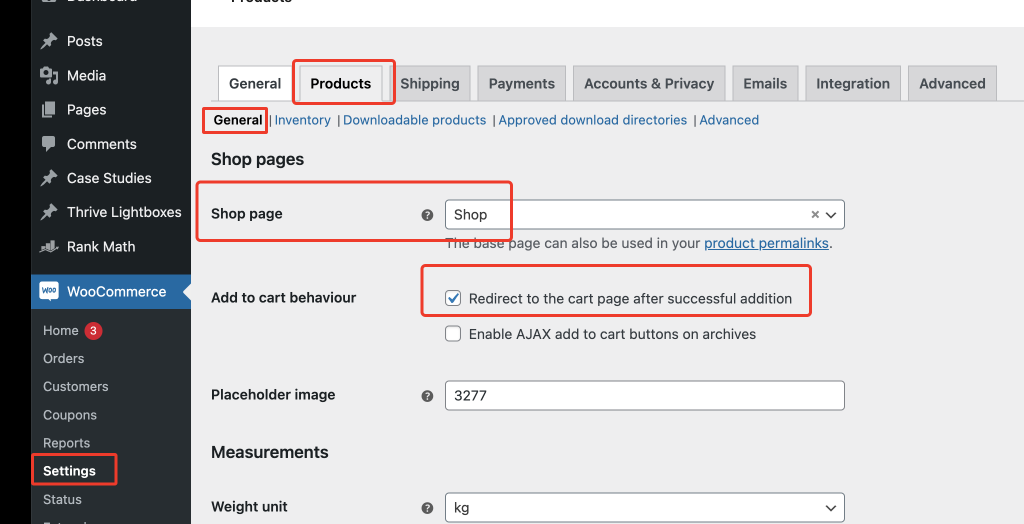
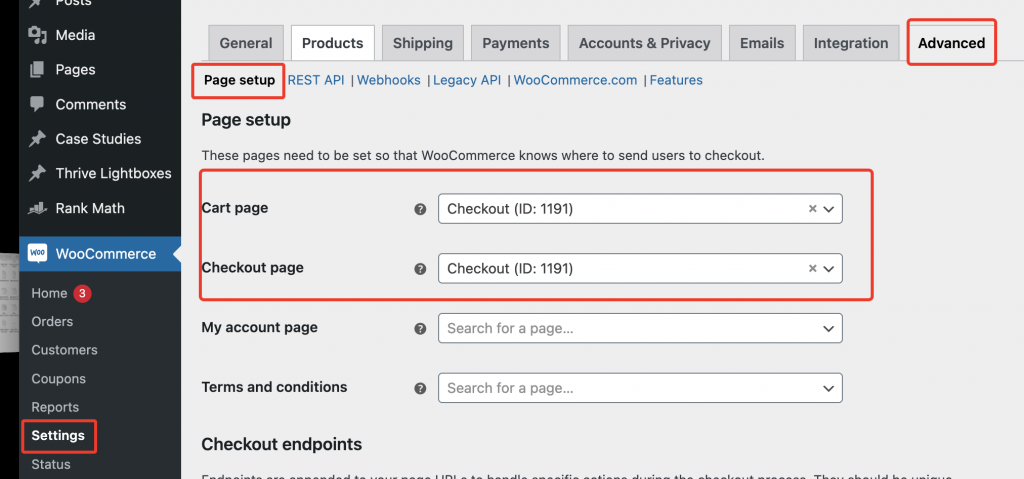
Under WooCommerce > Settings > Products > Page Setup, make sure both cart page and checkout page are pointing to your Checkout page.
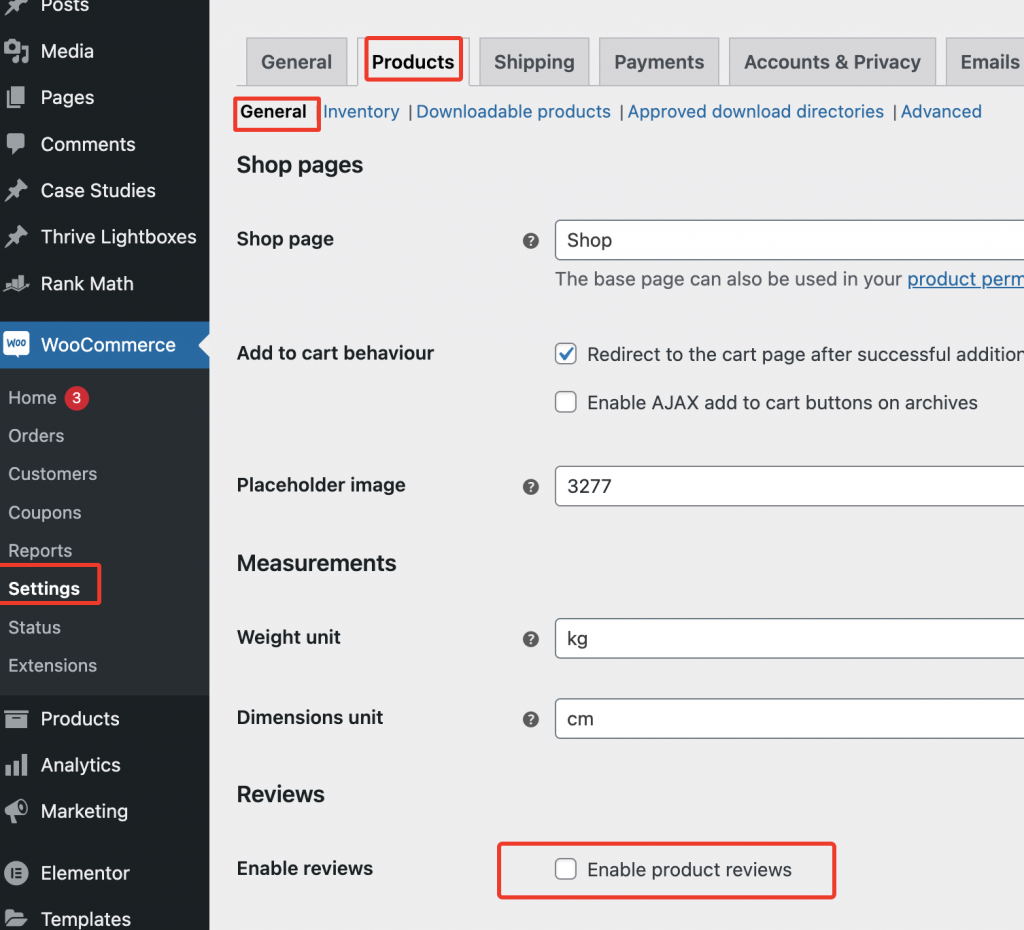
Disable product reviews
This one is simple and optional. I enable this to just keep it clean.
I hope the screenshot below is self-explanatory.
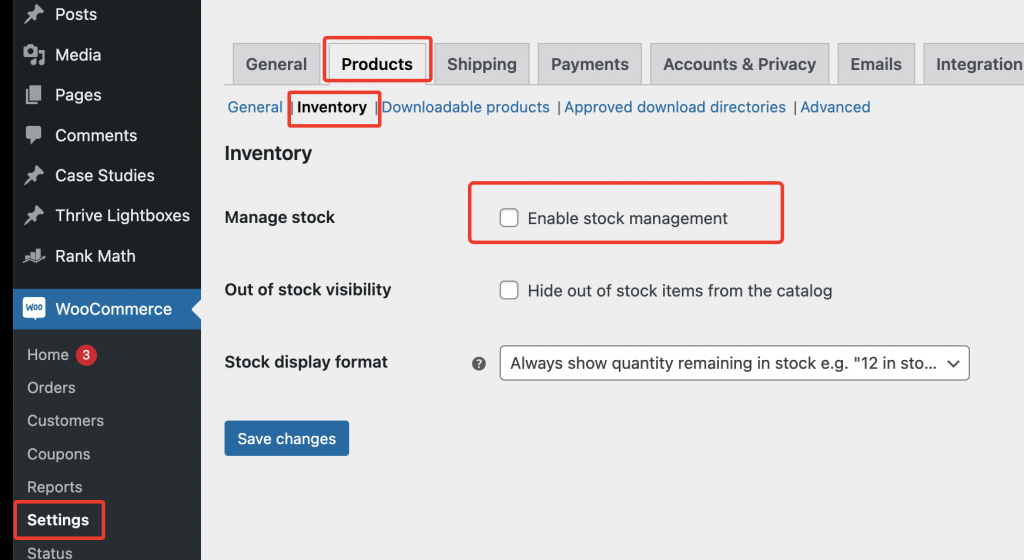
Disable stock / inventory management
Self-explanatory screenshot below – uncheck enable stock management.
Disable the cart functionality
This is the only complicated step.
Even if we skip the cart page, there is still a possibility of adding multiple items to the cart in the background. Then we end up having products on the checkout page that we cannot remove.
Step 1: So to avoid that, first enable the following setting in all your products (screenshot below)

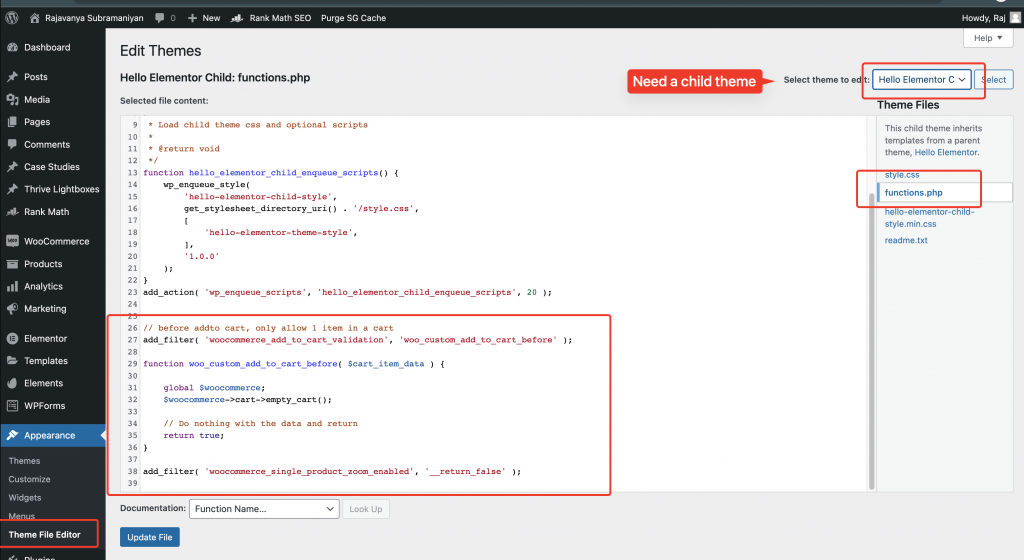
Step 2: This step requires you to have a child theme installed. If you don’t know what it is, I suggest you read this post. But most paid themes should provide one for download. You’ll have to simply install it alongside your actual theme. You can use a free plugin like Child Theme Configurator to generate one quickly.
Next you’ll need to copy-paste a few lines of code. First copy the code below.
It does two things:
- Disables the annoying zoom functionality that comes with WooCommerce
- Empties the cart, before adding a new item to it. This ensures the cart cannot have more than one item ever.
// before addto cart, only allow 1 item in a cart
add_filter( 'woocommerce_add_to_cart_validation', 'woo_custom_add_to_cart_before' );

function woo_custom_add_to_cart_before( $cart_item_data ) {

    global $woocommerce;
    $woocommerce->cart->empty_cart();

    // Do nothing with the data and return
    return true;
}

add_filter( 'woocommerce_single_product_zoom_enabled', '__return_false' );
Next go to Appearance > Theme File Editor > functions.php and paste the code as shown in the screenshot below.
Conclusion
If you followed the steps above, you should now have a streamlined, simple buying experience on your WooCommerce store that helps increase conversions / sales. Feel free to contact me with your questions.